
Ever wondered how to photograph SpaceX Starlink satellites? Well, there are potentially thousands of opportunities. As of May 2023, there are almost 4,000 Starlink satellites currently in orbit, with more being launched each month.
The Starlink satellite train appears brightest and most visible when they are newly launched because they are lower in orbit and travel in a train, making them more visible than a single satellite journeying through the night sky. Eventually, the Starlink satellites will ascend to their final orbit height of approximately 341 miles (550 kilometers) above Earth. Find out How to see and track the Starlink satellite train with our comprehensive guide. Not everyone thinks their visibility is a good thing, though.
There is controversy over who owns the night skies and how orbiting satellites and other human-made objects impact the night sky (including factors such as the effects on scientific data). A SpaceX best practices document published in 2022 outlines how the company continually reviews its construction materials, different technologies and operational techniques to reduce the observed brightness of the satellites. However, many of them remain visible to the naked eye and are photographable which is good news for skywatchers and astrophotographers that want to see and image them.
In this guide, we'll advise you on which camera, lens, tripod and camera accessories you'll need and tell you how to set them up to successfully capture the Starlinks. We also share how and when to see them in your location.
Related: Megaconstellations could destroy astronomy and there's no easy fix
Choosing a camera
As with all photography disciplines, having the right gear will simplify the process and ultimately improve your experience and photos.
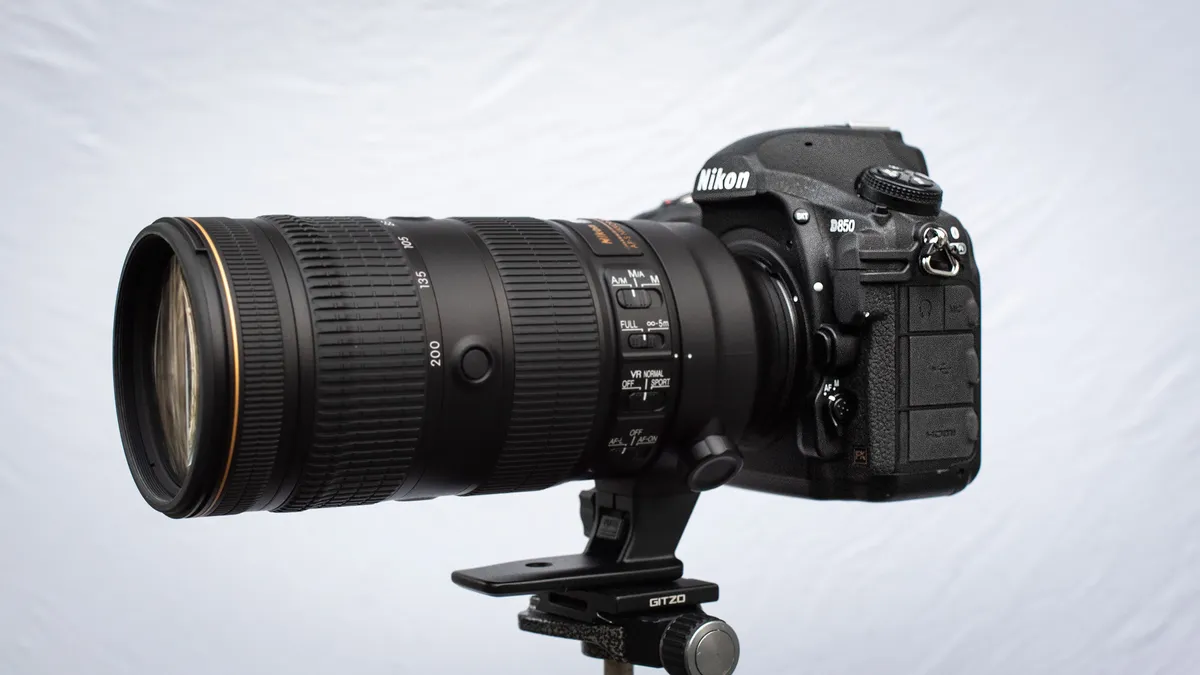
First and foremost, you will need one of the best cameras for astrophotography, this may be a DSLR such as the Nikon D850 or a mirrorless camera like the Sony A7R IVA. Whatever camera you photograph with it should have a manual mode to give full control over the aperture, shutter speed and ISO. But it must also perform well in low light.
Full-frame 35mm cameras are generally better at this than their APS-C crop or Micro Four Thirds counterparts and produce less image noise even when ISO sensitivities are being pushed. A camera with a self-timer or exposure delay mode is also useful if the photographer doesn't have a remote shutter release or intervalometer.
It's important to consider that DSLR lines are being dropped by many major camera manufacturers, so mirrorless systems may have better future-proofing. However, there is a massive back catalog of lenses available to the DSLR shooter and it's likely to be the cheaper way into night sky photography because of this.
However, there are many benefits to shooting mirrorless. The electronic viewfinder in mirrorless cameras can show brighter views of the night sky than DSLRs with an optical viewfinder.
A couple of camera suggestions that have all of these functions include the Sony A7R IVA which performs incredibly well in low-light and has an impressive dynamic range. Then there's the Nikon Z6 II which has a super ISO range, is good value for money, easy to use and has a large 3.2- inch touchscreen display. While these cameras are also great generalist cameras, if you're looking for something a little less specialist check out our Best cameras for photos and videos guide.
Choosing a lens
It makes sense to choose one of the Best lenses for astrophotography when photographing Starlink satellites. We would recommend a wide-angle lens with a fast maximum aperture in a bid to capture the vast distance the satellites will travel through in the night sky, as well as some foreground elements.
The best wide-angle lens we've ever tested is the Sigma 14mm f/1.8 DG HSM Art. It's supremely sharp and has a fast aperture of f/1.8 to drink in all those beautiful photons. However, it's also a fixed focal length prime lens.
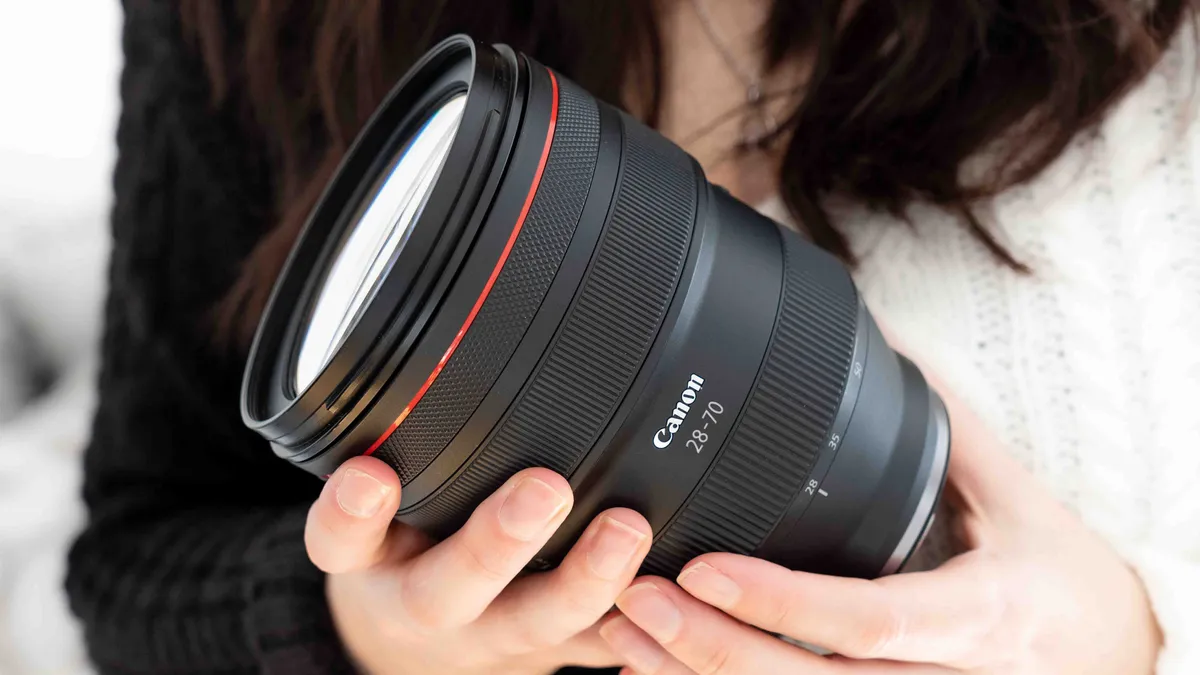
For those that need a little more flexibility perhaps one of the Best zoom lenses might be more appropriate. Canon shooters should look at the Canon RF 28-70mm f/2L USM Lens for ultimate sharpness and a handy zoom range.
A good budget option is the Rokinon/Samyang 14mm f/2.8 which is compatible with Canon EF mount, Nikon F-mount and L-mount cameras.
Choosing a tripod

One of the Best tripods is absolutely crucial for astrophotography and long-exposure shooting to keep the camera rock steady. Overall we'd recommend the Benro Mach3 TMA37C tripod because its carbon fiber construction is complemented with magnesium castings and is lightweight yet sturdy.
The best Starlink satellite shooting locations are ones with lower light pollution levels and that probably means traveling to get the best pictures. If you're hiking with a tripod it's best to take something portable and light. For this, we think the Peak Design Travel Tripod or the Manfrotto Element MIII tripods fit the bill because they are lightweight and fold down compactly.
Camera accessories that will help

You can start with just the kit mentioned above, but other gear may enhance and simplify your experience. For example, an intervalometer or remote shutter, if your camera doesn't have an inbuilt one, will be invaluable for taking the shot without touching the camera (and causing wobble). The intervalometer can be used to define the duration of your exposure as well as create time-lapses.
A red flashlight or headlamp would be helpful to preserve your night vision when getting to your location, setting up your tripod and so on. Your clothing needs to be comfortable and warm, there's nothing worse than having to cut short a shooting session because you are too cold. Remember you will be standing fairly still so will feel chilly quickly. We like carrying our Celestron Elements Firecel Mega 6 too as it's both a power bank and a handwarmer, so good save spacing, useful kit.
Location and timing
To take photos of the SpaceX Starlink satellite train we need to find where they'll appear in the sky based on time and location and ensure the weather is clear enough to see them.
A quick way to see if you may be in with a chance of seeing any Starlink satellites in your location is by using the aptly named findastarlink.com or the Find Starlink Satellites website, which even tells you which direction to look (e.g., North to East).
Because of the changing orbits, you could see them one day and not the next, even if you look in the same direction. There's also the satellite map that shows real-time locations of Starlink, including how fast they are traveling, what version they are and so on. Totally unnecessary for our photography purposes but some might find all the data interesting. You might find you're waiting some time before they will be visible in your desired location.

Timing is essential, the satellites could be passing right over your head, and you still might not be able to see them. The satellites themselves don't emit any light. What you're seeing is reflections, so the sun has to be in the correct position to 'catch' them and reflect the light to you; this means you're not guaranteed to see them, not forgetting that they travel nearly 500 km/300 miles per minute.
The best time to be in with a chance of seeing them is close to dusk and dawn when the sun is near the horizon (so the sky is dark), but it's still high enough to catch the satellites.

Of course, you also need a clear, cloudless sky. Plenty of apps are available that tell you how clear the sky will be; find them in our best apps for stargazing guide. Don't use these as gospel, though; the weather and cloud cover can change quickly. If you aren't planning on traveling far, just head outside and see if it's clear! If you are traveling searching for dark skies, say you're in a city where your sky is class 7 on the Bortle scale, use the Dark Site Finder to find a more appropriate location.
What camera settings you will need
Set the camera to manual mode. This gives full control over the ISO, shutter speed and aperture. We recommend shooting in RAW file format to enhance photos post-shoot with one of the Best photo editing apps. You can change this in the camera's on-board menu, or read through the manual to find out where this is on your camera.
Set the aperture
Once the above is set it's time to dial in aperture. This will determine how wide the hole in your lens opens during the exposure. A wider aperture (lower f-stop number) will gather more light and, when dealing with something as dark as the night sky, we need that as wide as possible. If the lens you're using opens up to f/2.8, then set aperture to f/2.8.
Dial in the shutter speed
The shutter speed determines how long the image sensor is exposed to the light for. To see the Starlink as trails, set your shutter speed to between 10 and 20 seconds. Longer shutter speeds will result in longer trails, and vise versa. Want to capture the Starlinks as pin-points of light? A shutter speed of 1/2 sec or faster is required, but that means the image sensor's sensitivity to light must be increased dramatically.

Crank up the ISO sensitivity
To make the image sensor more sensitive to light we must increase the ISO (ISO stands for International Standards Organization). But with a higher ISO sensitivity also comes more image noise. We'd recommend starting at around ISO800-1000 depending on your camera model (newer models will typically handle high ISO noise better).
If there is too much image noise for your liking drop the ISO down but counterbalance this with either a wider aperture or a slower shutter speed to maintain a good exposure. It may take some test shots to get something well-balanced.
Check the histogram on your rear LCD screen to ensure there is a bump in the graph in the second quadrant in from the left. If the graph data steeps all the way up to the left (the darkest portion of the graph) or touches it completely and it's hard to discern stars/satellites in the image, increase the ISO sensitivity or slow the shutter speed to suit.
How to set up the camera
If you're using a DSLR, cover the viewfinder with a viewfinder cap if you have one or improvise with some tape. This prevents unwanted light from entering the camera through the viewfinder and potentially ruining the exposure. You won't have to do this for mirrorless cameras because they use an electronic viewfinder (EVF), a mini screen inside the viewfinder window, and does not allow light to pass through to the image sensor.
Set your camera up on a tripod, composing your shot including any interesting foreground you might have, pointing in the direction the Starlink will pass (you may need to use a compass to discern which direction they will appear from). If your tripod is ultra lightweight or if it's particularly windy then weigh your tripod down. Most tripods have an attachment handle for weights. While you can purchase specialist camera weights we'd recommend taking a bungee cord and attaching the camera bag to support the tripod to save weight when moving on location.
If you have an intervalometer or remote release, set this up too. If you don't, simply use your camera's exposure delay setting. This is important because touching the shutter button during the exposure would almost certainly cause camera shake blur.
Use the EVF or turn on 'live view' on the rear LCD screen to compose the shot. The automatic uplift in exposure detail will help with the next step.
How to focus
Most cameras won't be able to automatically focus on objects in the night sky because it is so dark, so we have to do this manually. There is a tried and tested technique that is head and shoulders above the rest.
To focus, find the brightest star in your field of view (on the screen), zoom in and navigate to it; this 'star' may well be a planet. Make sure you're set to manual focus and not autofocus. There's a switch on the lens body, and sometimes on the camera body near the lens mount.
Turn the focus ring until the star/planet appears as a sharp pinpoint of light (rather than a circle). It may be necessary to take several passes back and forth with the focus ring until optimum focus is achieved. On the screen, zoom out again and don't adjust the focus for the remainder of the shoot unless it is obviously out of focus or has been knocked accidentally.
Exposure
Take some test shots and check your exposure using the histogram; you might need to press your info button to turn this on if you don't usually use it.
The histogram gives us a visual representation of the brightness values of all the pixels in our photo; it's best to use this method, as relying on the screen alone isn't always accurate.
As mentioned above, if all of the 'mountain peaks' in the graph are on the left 'wall,' the image is too dark; on the right, it's too bright. We're aiming for most of the peaks to be on the left but with some data nearer the middle of the histogram (meaning the image is dark but with points of light).
Make adjustments if necessary. If it's still too dark and you can't open the aperture wider, slow the shutter speed down further. If that still doesn't work, raise the ISO, but be mindful not to bump it up too much, as too much image noise can be tricky to edit out.
Post-processing
Now you have your images, download them into one of the Best photo editing apps for astrophotography to make the tweaks and changes to enhance them to suit your style or remove any unwanted elements.
There you have it, the basics of shooting the Starlink satellites — this will also work for capturing photos of the International Space Station. Use NASA's spot the station or Jamie Darpinian's satellite tracker to discover the best viewing opportunities.
Further reading
SpaceX Starlink Satellites Tracker. (n.d.). Retrieved May 2, 2023, from https://findstarlink.com/
Live Starlink Satellite and coverage map. Starlink satellite tracker. (n.d.). Retrieved May 2, 2023, from https://satellitemap.space/?constellation=starlink
How Starlink Works. Starlink. (n.d.). Retrieved May 2, 2023, from https://www.starlink.com/technology
Jonathan's space pages. Jonathan's Space Report | Space Statistics. (n.d.). Retrieved May 2, 2023, from https://planet4589.org/space/con/star/stats.html
Who owns the night sky? See what the International Dark-Sky Association thinks.
Find when Starlink will be overhead and when the sky will be clear
• Prepare your essential gear — shown in this guide
• Shoot in RAW
• Use the widest aperture you can
• Set the shutter speed between 20 and 30 seconds
• Set the ISO between ISO640 and ISO1000
• Manually focus in 'live view' mode. Zoom in on the brightest star/planet you can see and turn the focus ring until it is a sharp point of light
• Check the exposure using your histogram
• Use exposure delay/remote shutter to take your shot
• Edit using one of the best photo editing apps for astrophotography
