Shoot the Moon: How to Take Lunar Photos Through a Telescope
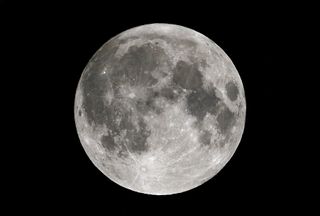
Shooting the moon is fun, easy and very rewarding. This is because the moon is so bright and appears so large in the sky that even a small telescope can reveal a lot of interesting surface details.
Today's digital single-lens reflex (DSLR) cameras, when used in conjunction with a telescope, will enable you to take stunning portraits of Earth's only natural satellite. You'll be able to capture not only countless impact craters of all shapes and sizes across the lunar landscape, but also craters with bright ray systems, towering peaks, jagged mountain ranges and dark, relatively smooth regions that early observers thought to be lunar "seas."
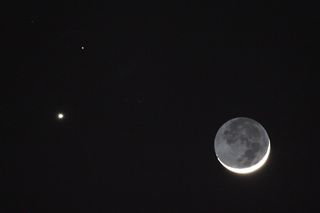
You can also use your telescope setup to document the moon's changing phases, which occur each month as the satellite goes from crescent to quarter to full and back to crescent. You can even record the moon's earthshine and conjunctions (close groupings) with planets, as well as partial and total eclipses. The result is souvenir photos of memorable lunar events that you can proudly display in your home or office, or enjoy sharing with family and friends.
There are basically three ways to photograph the moon through a telescope — shooting at prime focus, using eyepiece projection and using the afocal method. Below, we will give an overview of each technique, so you can try it out on the next clear night.
Prime-focus photography
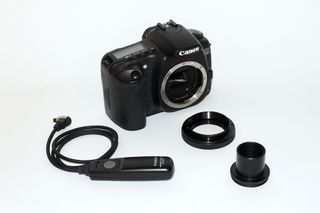
In this method, you attach your camera directly to the telescope, which essentially acts like a superpowerful telephoto lens. DSLR cameras excel in prime-focus (and eyepiece-projection) photography since they have removable lenses, making it easy to use a T-ring and adapter to connect the camera to the telescope focuser. You can buy these accessories from telescope retailers such as Celestron and Orion. Be sure to specify the make and model of your telescope and camera body when choosing an accessory. [See Our Visual Guide to Moon Photography with Telescopes]
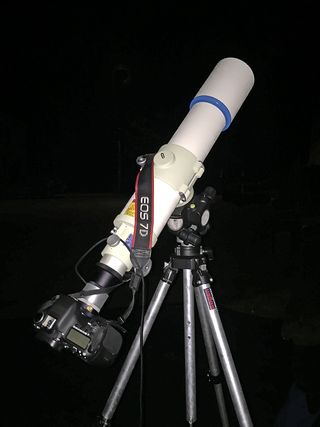
The size of the lunar image in the camera frame will depend on the focal length of the objective (front) lens in refracting telescopes and on the primary (main) mirror in reflecting telescopes. To get dramatic close-up views of the moon, you'll need a telescope with a focal length of 500 millimeters, or greater. A 500mm telescope will yield a lunar image that's about 5mm across in a DSLR camera with a full-frame, 35mm-format sensor; a 1,500mm telescope will produce a 14mm image, and a 2,000mm telescope results in an 18mm image. With consumer DSLRs that use smaller APS-C sensors, the lunar image will appear larger because of cropping of the camera frame.
To obtain sharp images of the moon, focus your telescope/camera combination as best as you can. Many DSLR cameras offer "live-view" mode, which allows you to see what the camera sensor sees through its built-in LCD screen. You can zoom in on the image at up to 10x magnification to refine the focus.
Get the Space.com Newsletter
Breaking space news, the latest updates on rocket launches, skywatching events and more!
The greatest advantage of digital cameras over film for shooting the moon is that you get instant feedback. What you see on the LCD screen is exactly what you get. The key is to "bracket" your exposures, that is, shoot as many images as you can, using various exposure settings. This way, you'll increase your chances of catching some really good shots.
For example, if you photographed the full moon with a short-focus telescope at an ISO setting of 200 and a shutter speed of 1/1,000 of a second and the resulting image looks washed out (overexposed), try increasing the shutter speed to 1/2,000, or faster. If the image looks dim (underexposed), try decreasing your shutter speed to 1/500, or slower. You can also adjust the ISO sensitivity, decreasing it if the image is overexposed or increasing it if it is underexposed. Don't be afraid to experiment; just keep on trying different exposure settings until you obtain the result that works for your particular setup.
Eyepiece-projection photography
This method is used to capture highly magnified views of lunar mountains or individual craters. To accomplish this, you'll need to add an eyepiece in between the camera body and the telescope using a special adapter tube, which holds the eyepiece in place.
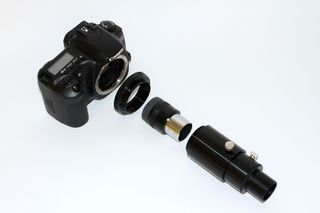
First, insert and lock the eyepiece inside the tube and attach the adapter to the appropriate T-ring. Second, mount the T-ring onto the DSLR body and attach the whole assembly to the telescope's focuser. Finally, use the focuser to bring the camera into focus by looking through the camera's viewfinder or LCD screen. To aid in focusing, aim the telescope on the moon's bright edge or a prominent crater along the terminator, the lunar day/night boundary. [Target: The Moon - Special Telescope Tricks]
The configuration will enable you to double or triple the image scale, depending on the focal length of the eyepiece used and the projection distance between the eyepiece and camera sensor. But the downside is that it's going to be more challenging to focus the telescope since the resulting image is going to be quite dim. You'll also need to compensate for the decrease in image brightness by extending the camera's exposure time or boosting its ISO sensitivity accordingly.
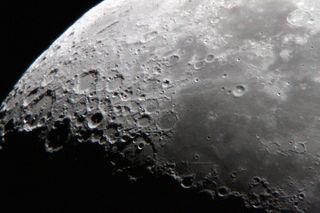
At such image scales, any vibrations will be highly magnified, too. To minimize camera shake, be sure to mount the telescope on a sturdy tripod or base. You can reduce vibrations even further by locking the DSLR's viewfinder mirror up and using an electronic "cable release" to operate the shutter button. A good alternative would be to use the camera's built-in delay timer to open the shutter.
At very high magnifications, even the motion of the moon across the sky can smear the image during a long exposure. That is why, in this situation, it's best to use a motor-driven equatorial mount for your telescope setup.
Afocal photography
You can use this method if you can't remove the lens in your camera, as in the case of pocketsize "point-and-shoot" cameras and smartphone cameras. First, aim the telescope at the moon. Then, with a low- or medium-power eyepiece, adjust the telescope focuser until the lunar image appears sharp. Once the telescope is focused, simply hold the camera directly into the eyepiece and use the camera's built-in LCD screen to compose the shot.
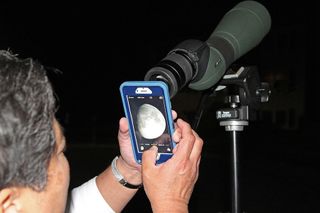
While hand-holding the camera up to the eyepiece, try to keep the camera as steady as you can. This is harder than you might think, so prepare to be disappointed with your initial results. Just keep on taking test shots until you get it right. If you're using a regular camera tripod, the moon will drift steadily across the telescope's field of view as the Earth rotates, so you only have a half minute or so to take the shot. Then you'll have to re-adjust the telescope to keep the moon aligned with the eyepiece and camera.
While hand-holding will give decent results, you can obtain better, more consistent images if you buy a commercial bracket or adapter from camera retailers or online stores (just Google "digiscoping," which is another term for afocal photography). If you're handy with tools and machining, you can make your own custom mount. Whatever your choice, make sure the bracket or adapter will hold the camera securely to the eyepiece.
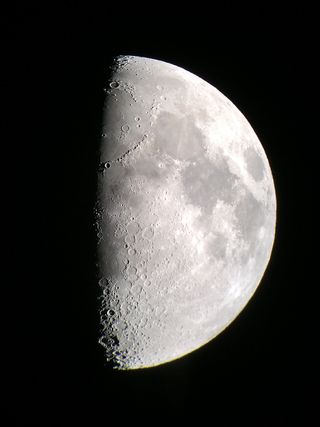
If you see vignetting, or darkening around the edge of the image, that means the camera is positioned too far from the eyepiece. To reduce or eliminate vignetting, move the camera as close to the eyepiece as possible while keeping the camera centered. You can also increase the size of the lunar image by switching to a high-power eyepiece or using the camera lens's zoom feature.
You can leave the camera in autofocus and auto-exposure modes when taking images, or if you prefer, you can adjust the settings yourself (check the camera manual on how to do this). There are third-party apps for smartphone cameras you can purchase that will let you control the exposure and edit the photos.
Some final thoughts
No matter how precisely focused your telescope is or how good the quality of your telescope optics is, the sharpness of your lunar images will always be at the mercy of turbulence in the upper atmosphere. Atmospheric turbulence, which causes stars to twinkle, is the bane of all lunar and planetary photographers, since poor "seeing" conditions can render fine surface details into a boiling, roiling mess. So if parts of your images look fuzzy or distorted, it could be because of bad seeing. Your best option would be to photograph the moon when it's high in the sky and to keep on shooting in the hope that you might capture an image during that fleeting moment when the atmosphere is steady.
Good luck, and clear skies!
Editor's note: If you capture an amazing photo of the moon that you'd like to share with Space.com and its news partners for a story or gallery, you can send images and comments in to: spacephotos@space.com.
Veteran astrophotographers Imelda Joson and Edwin Aguirre have been photographing the moon for more than three decades, starting with Kodak Tri-X black-and-white film. Follow us @Spacedotcom, Facebook and Google+. Original article on Space.com.
Join our Space Forums to keep talking space on the latest missions, night sky and more! And if you have a news tip, correction or comment, let us know at: community@space.com.
Imelda B. Joson is a veteran astrophotographer, as well as an eclipse chaser and world traveler. With her husband, Edwin Aguirre, she has organized, led and/or participated in 11 solar eclipse expeditions in North America, Asia and Africa. The pair also conceptualized and created National Astronomy Week, an event that celebrates and publicizes astronomy in the Philippines.
Most Popular


