How to Photograph the Rare Transit of Venus Safely

Witnessed only seven times since the time of Galileo, Venus’s solar crossing on Tuesday (June 5) is a rare and historic event that shouldn’t be missed. Unless modern science discovers a way to delay or halt the aging process, this will be the last Venus transit we’ll ever get to see in our lifetime — the next transit won’t take place until 2117, or 105 years from now.
The transit of Venus in 2012 will begin at about 3:09 p.m. PDT (6:09 p.m. EDT or 2209 GMT) and last nearly seven hours as Venus crosses the face of the sun, according to NASA. Observers on seven continents, including part of Antarctica, will be able to see the Venus transit, though for some skywatchers the event will occur on Wednesday, June 6, due to the International Date Line.
But how can Venus transit photographers capture the rare celestial sight safely? The basic requirements for photographing the transit with a digital camera are very much the same as those for imaging sunspots or a partial solar eclipse. And as luck would have it, these same tips can help you snap photos of a partial lunar eclipse of Monday (June 4), too!
Here are things to keep in mind when shooting this much-anticipated celestial alignment for posterity:
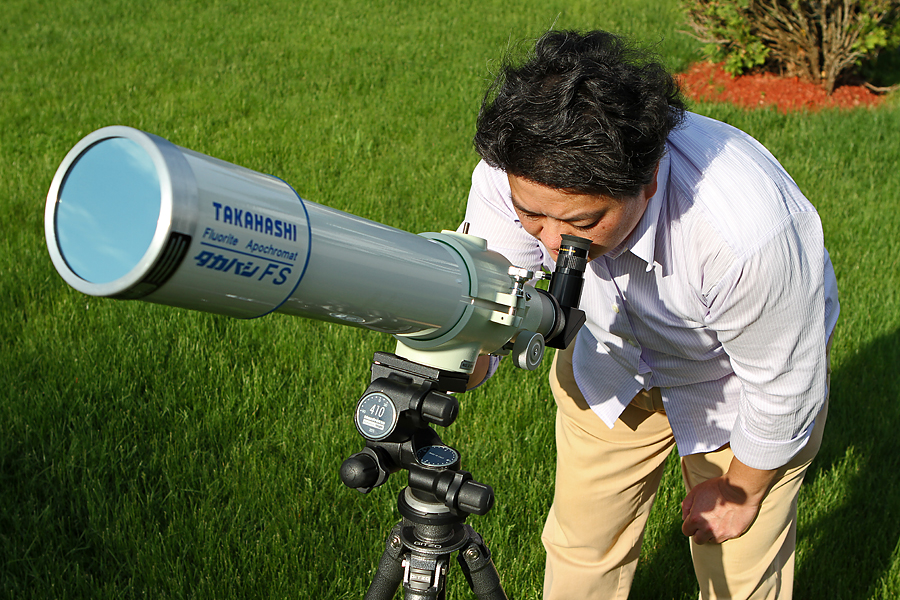
1. Filter! Filter! Filter!Protect your eyes and equipment by using a proper, visually safe solar filter to cut down the sun’s intense brightness and heat. Use a No. 14 welder’s glass filter or purchase special solar filters — made of aluminized polyester or black polymer film or metal-coated glass or resin — from reputable dealers such as Thousand Oaks, Astro-Physics, Kendrick Astro Instruments, and Orion Telescopes & Binoculars. Make sure the filter is securely mounted on the front of your telephoto lens or telescope.
Color-negative or slide film, smoked glass, ordinary sunglasses, Mylar balloons, space blankets, black plastic trash bags, CDs, and polarizing or neutral-density (ND) filters used in regular photography are considered not safe for solar viewing, and therefore should not be used. [How to Safely Photograph the Venus Transit (Photo Guide)]
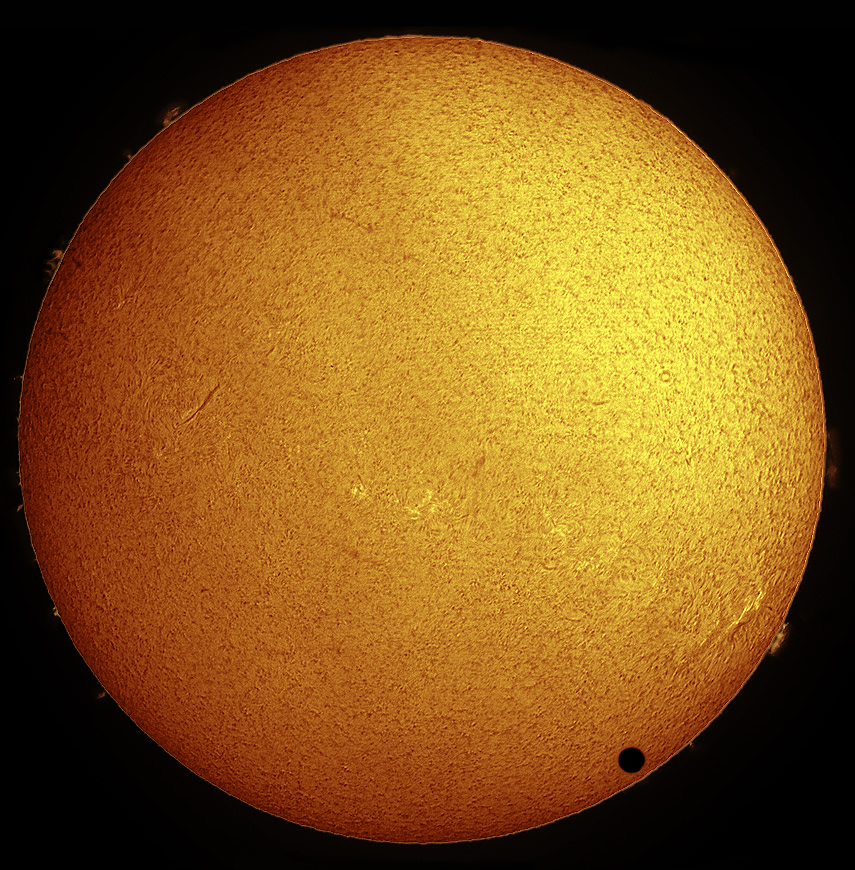
2.Use a telescope or telephoto lens: Decide what you want to record — the whole disk of the sun with the tiny pitch-black silhouette of Venus in it or close-ups of the ingress (entry) or egress (exit) of Venus’ disk along the edge of the sun to try and record the so-called “black-drop” effect. In this elusive phenomenon, first reported by astronomers during the transit in 1761, as Venus’s silhouette makes contact with the solar disk’s edge, Venus’s outline seems to get distorted into a teardrop shape.
Breaking space news, the latest updates on rocket launches, skywatching events and more!
To produce a reasonably large image of the sun with a digital camera, you’ll need a telephoto lens or telescope with a focal length of 500 to 1,000 millimeters, or even longer. You’ll also need a tripod or mounting that is beefy enough to carry the load.
You can boost the magnification of your telephoto lens using a 2x teleconverter. For the telescope, try magnifying the image with an eyepiece or Barlow lens.
3. Check your focus: Focusing is especially critical when you use a telescope or long telephoto lens that doesn’t have a fixed “infinity” setting. Don’t rely on the camera’s auto-focus function; switch to manual (M) mode instead and use the edge of the sun or nearby sunspots for focusing. Once you achieve sharpest focus, tape down your lens’s focus ring (or lock the telescope focuser) to prevent it from accidentally being moved during the transit. Be sure to recheck your focus as the transit progresses since daytime heating can cause the focus to shift slightly. If needed, wrap a space blanket around your gear to keep it cool.
4. Shoot at high resolution: A digital camera’s image quality and resolution is determined by the number of pixels in its sensor (expressed in millions of pixels, or megapixels). The more pixels the camera has, the better the quality of the image will be. To take full advantage of the camera’s capability, shoot images using high-resolution formats such as the highest-quality JPEG or uncompressed TIFF or RAW files. This will allow you to make 8 x 10, 11 x 14, or larger, prints while retaining the images’ overall sharpness and smooth tones. [Venus Transit of 2004: 51 Amazing Photos]
5. “Bracket” your exposures: You can either use the camera’s auto-exposure mode or manual (M) mode to determine your exposure settings. If you prefer to do it manually, try various combinations of shutter speed, f/stop, and ISO speed — a technique known as “bracketing” — and see which ones would come out best and use that as a guide. Don’t be afraid to experiment.
To capture the moment of ingress and/or egress, switch your camera to continuous shooting or “burst” mode so it can take many shots in quick succession. Be sure to test your equipment and practice your procedure ahead of the transit. Try to do your testing around the same time of day the transit will occur to determine the best exposure to use.
6. Try to minimize vibrations: The slapping of the viewfinder mirror in DSLR cameras can cause blurry images, especially at slow shutter speeds. To reduce camera jitter, operate the shutter button with a long mechanical or electronic cable release, or use the camera’s delay timer. If possible, lock the viewfinder mirror up before each exposure (consult your camera manual on how to do this). Use an ISO setting of 400 or 800 to keep your exposures short. [Amazing Video of the 2004 Venus Transit]
Choose an observing site that is far from vehicular or pedestrian traffic and is sheltered from the wind. A geared head or fluid head on a tripod can eliminate jerky movements and make it easier to manually follow the sun as it moves slowly across the sky. To improve the tripod’s stability, hang your backpack, camera bag, water jug or other weights under its center post. You can also place rubberized footpads or mats under each tripod leg to absorb ground or wind vibrations.
Digital cameras can be power hogs, especially if you use the LCD screen constantly. If your camera has an AC power adapter and there’s a wall outlet nearby, use them so you don’t have to worry about depleting your battery during the transit.
High-resolution images take up a lot of memory so use fast, large-capacity storage cards (4 to 8 gigabytes, or more) to avoid running out of memory at a critical time.
8. Shoot the transit in hydrogen-alpha: Specialized hydrogen-alpha telescopes, such as the Coronado PST and SolarMax II series from Meade Instruments, provide stunning details on the sun, which make for a dramatic backdrop to Venus’ disk.
Unlike ordinary, unfiltered light from the sun, also known as “white light,” H-alpha is the red light emitted by hydrogen atoms in the sun’s atmosphere, called the chromosphere, at a wavelength of 656.3 nanometers. If there are large solar prominences along the edges of the sun, it might be possible to glimpse Venus against a prominence right before the planet’s disk enters, and right after it leaves, the sun’s disk.
9. Shoot with video: As with digital cameras, you’ll need a proper solar filter over the camcorder’s lens. Many camcorders have zoom lenses with up to 40x or more optical magnification. To videotape the transit, simply mount the solar-filtered camcorder on a tripod, aim it at the sun and zoom in to its highest power. Use the camcorder’s manual settings, if available, to prevent the sun’s image from getting overexposed. Take short clips every five minutes or so to create a short time-lapse movie of the Venus transit.
High-end DSLRs as well as smartphones are also capable to shooting still shots or HD videos of the transit through a solar-filtered telescope.
10. Check the latest weather forecast: Get the latest weather update from websites such as the National Weather Service, AccuWeather, The Weather Channel or Weather Underground. You can also view the latest weather images and animations from NOAA’s GOES satellites to help you plan on where to go in case clouds or rain showers threaten your intended Venus transit observing site.
After the transit, be sure to backup all your still images and/or videos right away on DVDs, flash drives or your laptop’s hard drive so you don’t lose any of your precious mementos.
Partial lunar eclipse photography tips
As an added celestial treat to skywatchers, a partial eclipse of the moon will occur on Monday — the eve of the transit of Venus.
A partial lunar eclipse takes place when the full moon passes through the dark central part of Earth’s shadow, called the umbra, and gets partly covered by the umbra.
Observers in eastern Australia and the Pacific will have a ringside view of the entire two-hour-long eclipse. They will see the moon immersed more than a third of the way (37 percent) into the umbra at maximum eclipse. [Lunar Eclipse of June 4: Observer's Guide (Images)]
Most of North and South America will see the moon set before the eclipse ends; eastern Asia will miss the start of the eclipse since it occurs before the moon rises.
In northeastern United States and eastern Canada, no part of the umbral eclipse will be visible since the event starts after the Moon had set. Western Canada and the U.S. West Coast offer the next-best views — the moon doesn’t set there until after mid-eclipse.
You can use the same transit setup and technique to photograph the partial lunar eclipse, minus the solar filter, of course. You will not see anything if you leave the solar filter on! Be sure to put it back on before you shoot the transit the following day.
Good luck and clear skies!
Veteran astrophotographers and transitophiles Imelda Joson and Edwin Aguirre are planning to capture the transit from Southern California as the sun sets over the Pacific.
Imelda B. Joson is a veteran astrophotographer, as well as an eclipse chaser and world traveler. With her husband, Edwin Aguirre, she has organized, led and/or participated in 11 solar eclipse expeditions in North America, Asia and Africa. The pair also conceptualized and created National Astronomy Week, an event that celebrates and publicizes astronomy in the Philippines.


